All Gone!

Yesterday my friend Kamila (who’s also a kickass photographer) came by to pick up our soundproofing!

I had it all stacked outside waiting for her.

DSC_0013

She loaded up the car and – VOILA! – no more soundproofing. I’m so glad it’s getting reused! It was either that or recycle it (all cardboard). Hope it’s just what you guys need & it works!

Posted in 2nd floor | Tagged , , , , , | 1 Comment

Hate. Lots & Lots of Hate.

I want to punch our risers in the face; if risers on staircases had faces (or would it be singular “a face”?) but they don’t, so I can’t. GAH!

Yesterday I was chipper and optimistic. Today, not so much.

oscar the grouch

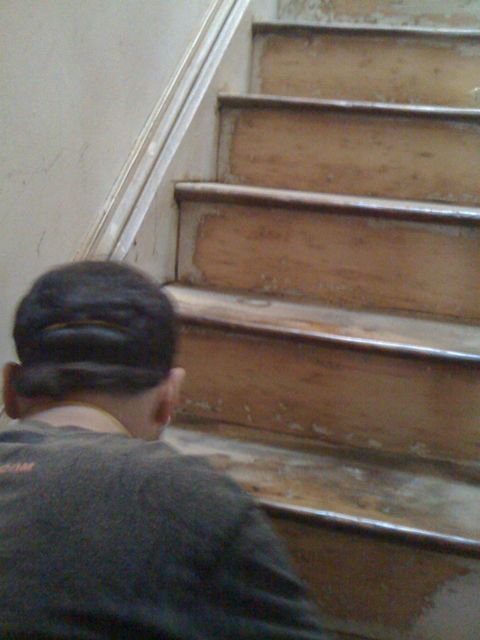
We naively began sanding the risers last Wednesday. We started using a palm sander with 40 grit sandpaper. It.took.forever. But slowly we were seeing a difference. That is until the pad you stick/clamp the sandpaper to wore out.

Now the sandpaper doesn’t make great contact with said riser. Also, it clamps kinda funny so the super thick 40 grit sheet does get pulled taut and therefore just snaps at the clamp. This would be the same pad that Home Depot does NOT stock. Some internet search found that Sears may, but I have to call. Otherwise we have to have it shipped from DeWalt.

So Wednesday evening, when we realize that the palm sander just isn’t cutting it, we move on to plan B. Bring in the bigger guns!

DSC_0214

Enter the Black & Decker 3″x21″ Dragster Belt Sander.

B&D Dragster Belt Sander

According to the description, uses include:

  • Reaches to sands under kitchen cabinets
  • Sand decks to the edge – under railings.
  • Between spindles and banisters
  • Sanding large surface areas – Floors, Counter Top
  • Fast and aggressive material removal on rough surfaces like decks or table tops
  • Smoothing uneven edges or lips like uneven hardwood floors
  • Hard to reach areas

Sounds PERFECT!!

And this baby has power! Awesome.

DSC_0216

We didn’t purchase said “Big Gun” until late last Wednesday evening. At 10pm, 4 steps into the last staircase, we decided our neighbors would probably appreciate it if we turned the power tools off.

DSC_0222

We left for the shore knowing there was more sanding to do but confident we could finish it up this week.

Last night, we went back over to finish. Plugged everything in and picked back up with the 4th step down (we’d left off in the middle of it).

We were finding that the “Big Gun” was leaving ridges in the risers. It’s a large sander for such a small space. There’s not a lot of room to keep it moving, which is essential for all sanders but especially belt sanders.

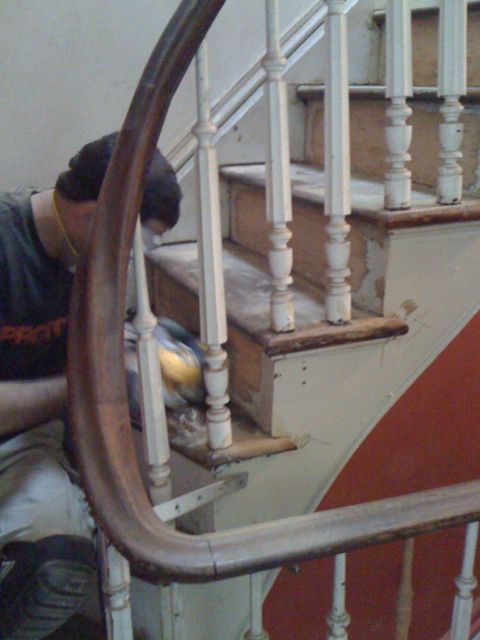
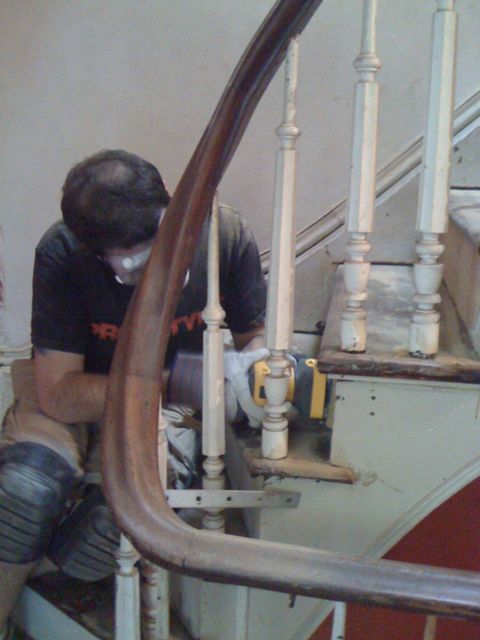
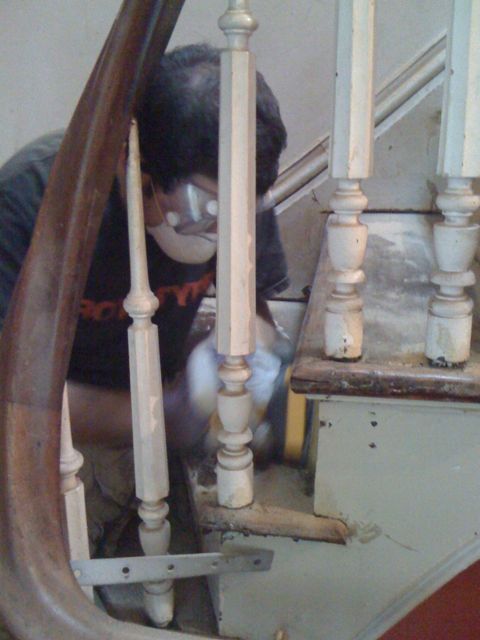
Rob worked his way down the stairs.

DSC_0217

And I followed with the palm sander to even things out.

About 5 minutes into sanding, I made an awful realization.

We can’t have nice things.

Immediately I told Rob to stop but damage was already done.

DSC_0005

If you look closely at the belt sander, you may notice a small black knob on the right side.

knob

If that knob is on the top, you can get the belt pretty close to the tread, moving toward the banister. However, when you hold the sander in the OTHER direction, moving toward the wall, that knob is now on the bottom of the belt. It’s also now on the side that’s already farther away from tread because of the placement of the belt.

You can see where I’m going with this.

Unknowingly, we were dragging said knob across our treads.

DSC_0006

Our brand-spanking-newly-refinished treads.

DSC_0003

Yup. It’s official. We can’t have nice things.

Ever the eternal optimist (even when I’m grouchy), I guess it could be worse. We could have kept going and noticed only when vacuuming up all the sawdust after we were all done.

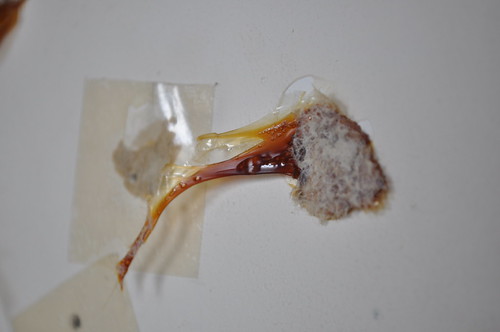
Luckily we stopped as soon as we realized. It seems only 2 of them (the 2 in these pics) are badly scratched up. And it’s all right close to the riser, not far out into the middle. With a little touch up stain & sealer we should be able to fix it. It’ll add “character.”

But it’s just one more thing added to the ever-growing, never-shrinking TO DO list.

I think we will be purchasing a few new pads for the palm sander and taking the slower, yet less destructive, path to sanded risers.

Posted in Floors | Tagged , , , , , , , , , , , , , , , , , , , , , | 9 Comments

You’re Invited!

This coming weekend, July 18 & 19, is our next Work Weekend and your chance to be added to the Wall of Awesome. Here’s the plan:

Garden Apartment

  • Paint bathroom
  • Install shower surround
    DSC_0222
  • Install tile in bathroom & back entryway
    DSC_0205
  • Secure gas line in kitchen
  • Move outlets (if needed)
  • Install drywall in kitchen (hopefully?)
    DSC_0365
  • Install new header in fireplace & move right support
  • Run electric & co-ax cable for TV
    DSC_0190
  • Patch drywall

Upstairs

  • Smooth spots out in our de-proofed room with joint compound
    DSC_0053
  • Paint master bedroom
    master
  • Paint study/walk-in closet
    Closet: from back wall facing street
  • Paint 2nd floor back bedroom
    DSC_0678
  • Paint hallways
    stairs to 2nd floor
  • Paint living room
    Living Room
  • Paint dining room
    dining room

This TO DO list is rather ambitious. There’s a lot of prep work to do before we can even paint. I’m starting that To Do list now. The weekend may end up doing that To Do list so we can get to the other TO DO list. Confused yet? Yeah, me too.

If you’re free, we’d love the help! Let me know if you can come and I’ll get you the details (brickcitylove at gmail dot com).

Afterwards, we’ll hit up the local watering holes. Maybe McGoverns? Maybe Nicks? Maybe the Flavor Tripping party at Hell’s Kitchen? You’ll be able to say that you knew Newark was hip before everyone else! Hoboken was sooo 5 years ago.

Hope you can come!

Posted in 1st floor, 2nd floor, 3rd floor, bathrooms, bedrooms, garden unit, Wall of Awesome | Tagged , , , , , , , , , , , , , , , , | 5 Comments

We’re Home

Last week was our vacation. While we worked on the house for the first half of the week, we spent Thursday – Sunday down the shore. It was amazing.

Work tomorrow will be full of catching up. Lots of amazing pictures but here’s a sneak peek at some of our fun.

skee ball

Have a happy Monday! Back to your regularly scheduled renovating tomorrow or Tuesday.

Posted in Non-house | Tagged , , , , | 5 Comments

* * * Fireworks * * *

Last Saturday we saw some AWESOME fireworks. Unfortunately the City of Newark didn’t do fireworks (to my knowledge) but  Macy’s NYC fireworks were going off in the Hudson River this year.

We headed down to Newark Penn Station.

DSC_0193

And hopped on the PATH train to Hoboken.

DSC_0196

Got to the river about 7pm with about 2hrs & 26 minutes to kill before the fireworks started.

DSC_0198

DSC_0256

For those familiar with Frank Sinatra Blvd, we were sitting at the railing here

DSC_0238

And if you looked up, you’d see this –

DSC_0279

Aren’t we cute?

DSC_0205

Rob went in search of margaritas but couldn’t find any. This was the next closest thing. I was unaware that Edible Arrangements also made smoothies. It was good but very frothy.

DSC_0318

It was cool watching the sun set over the city.

DSC_0335

DSC_0345

DSC_0353

DSC_0359

Rob started playing with the camera lens, zooming in or out as the shutter closed.

DSC_0364

It created a lot of motion (as one would expect).

DSC_0366

This one he held the lens steady and zoomed by rotating the camera.

DSC_0375

Here’s a steady one just in case you started getting dizzy.

waiting for fireworks

At 9:26, the fireworks started!!

DSC_0391

DSC_0406

DSC_0424

DSC_0436

DSC_0445

DSC_0457

DSC_0465

DSC_0476

DSC_0491

DSC_0514

DSC_0517

DSC_0526

They were awesome! And I probably would have gotten better pictures with a tripod and zoom lens. Oh well. There’s always next year.

Afterward we avoided the initial PATH rush out and grabbed some nosh at The Kebab House.

DSC_0600

While waiting for the train home, Rob started pointing across the platform and I thought it was the weirdest thing. For the life of me, I cannot replicate that.

DSC_0604

You’re trying to do it, aren’t you? I knew it. 😀

Posted in Non-house | Tagged , , , , , , , , , , | 1 Comment

De-Proofed

When we moved in, the front bedroom on the second floor looked like this:

DSC_1001

Every square inch covered in sound proofing tiles. And when I say every square inch, I mean EVERY square inch (except the floor).

DSC_1003

They were meticulously cut to fit perfectly around the ceiling medallion, electrical outlets & light switches. It must have taken forever.

DSC_1009

I almost felt bad taking them down. Almost.

Rob taking it down

As previously mentioned, we started taking them down Saturday but cut it short to go see some awesome fireworks.

DSC_0499

They were fantastic, by the way, but that’s not what this post is about.

DSC_0127

Rob and his Spartan Spear tackled it Monday.

DSC_0053

It popped off pretty easy.

DSC_0075

DSC_0086

It did make quite the mess though. I tried to stack as we went. It didn’t really work. And that was before we tackled the ceiling.

DSC_0092

See all those little bits that look like dots? That’s the adhesive; it came in a variety of forms.

The most common was the hard brown pellets –
DSC_0175

A few places used double-sided foam strips –
foam strip adhesive

And, finally, a couple places had this yummy looking brown goop –
brown goop

Then it was on to the ceiling.

DSC_0093

DSC_0098

DSC_0099

I even got a turn with what’s quickly becoming the most popular tool in the house.

Carrie scraping

We got all the sound proofing stacked in hopes that someone will be able to use it.

ALL the sound proofing

stacked & ready to go

All done!!

Posted in 2nd floor, bedrooms | Tagged , , , , , , , , , , , | 9 Comments

Jenn & John

Our first non-family additions to the Wall of Awesome*!!

Jenn & John

Jenn & John came up Tuesday night and helped us tackle the 2nd floor bathroom.

2nd floor bath

That fugly wallpaper was already peeling off.

2nd floor bath wallpaper

They helped it all the way off.

John scraping

more scraping

YAY! First step in the bathroom remodel is underway.

DSC_0116

DSC_0128

Thanks guys!! It was awesome seeing you.

heart scraping

wallpaper heart

Awwwww!!!

mask kiss

Jenn’s leaving in 2 days to work down in Nicaragua for a month with our other friend Ali. Lets all say a little prayer that they have an amazing time and come home safely. John, you’re welcome to come back up if you get bored without her.

Jenn & John

*We have decided that we will have an actual Wall of Awesome in our house. We’re going to take pictures of everyone who comes help. Said pictures will be framed and hung all grouped together. So if your name emblazoned on the interwebs in all it’s bloggy goodness isn’t enough for you, how about an actual picture on an actual wall in our actual home?! Yeah, I thought that might sweeten the deal. And you can pose with props! See how John got to pose with the Spartan Spear?? Rock.

Shameless Plug: Our next Working Weekend is coming up July 18 & 19! We will be working on finishing the garden apartment and painting. Power tools & paint rollers; something for everyone! If you want in, shoot me an email (brickcitylove at gmail dot com).

Thanks Jenn & John!!!

Posted in bathrooms, Wall of Awesome | Tagged , , , , , , , , , , | 4 Comments

Riser Sanding

Day 3 of our vacation is going swimmingly. Went shopping this morning (we’re going down the shore tomorrow and I needed a bathing suit) and now we’re working on the house.

I replaced the plaster behind the door with some drywall and am waiting for the joint compound to dry. Rob is currently sanding the risers on the staircase. We’re working top down and the first few didn’t go so well.

They were caked with something hard & gross; adhesive maybe? It was going so badly, we had a 20min conversation deciding if we should just have Jon back. In an effort to keep the refinishing costs within budget, Jon just did the treads. Refinishing the risers was extra. We decided to keep sanding and see what the next hour brought.

After the first 3, things started to look up. It’s still taking forever but it’s working. We’ve (& by “we’ve” I mean Rob) got 2 risers left on the top staircase. Then it’s on to the 1st floor staircase.

Proper update coming tomorrow!

Posted in Uncategorized | 3 Comments

Review: JDL Floors

For our floor refinishing, we used JDL Wood Floors. This post details why we selected them, now onto the review.

Overall, we were very satisfied with the service and quality of the job and would highly recommend them.

Our floors were in rough shape (as you may remember from here, here, & here). Lucio (Jon’s head refinisher) and his crew were able to bring them back to their original splendor (or rather, what I imagine that to be).

Jon was very easy to work with. Communication was great; he returned our calls, emails, & texts promptly. He was able to work with our tight timetable and started 2 days after we agreed on the total price. Regarding the cost, he really worked with our budget and didn’t go over. What we agreed upon before work began was what we paid upon satisfactory completion. The lack of surprises was awesome.

We knew we wanted the floors stained but didn’t know exactly what color. Lucio put some test samples down at the end of sanding day 1.

stains numbered & named

Seeing the samples actually on the floors was crucial! SO so helpful for us. Stains looked a lot different on our floors than they did on the Minwax website. (We went with #3, Provincial, by the way.)

Things I wish I’d known & would have done differently:

  • Hire a plumber & remove the radiators. We didn’t remove the radiators before JDL started working in hopes that the refinishing could just happen around them. While they were able to scrape under the radiators, they weren’t able to get behind them. It’s not noticeable but if (God forbid) we ever remove the radiators, it will be.Behind the radiator
  • New wood & old wood take the stain VERY differently. This isn’t a bad thing! We had some rotted areas that needed to be replaced and couldn’t find any reclaimed wood. If we weren’t on such a tight deadline, we may have spent more time looking for 130+ year old pine but it just didn’t work for us. The new wood stained lighter than the old wood.Patched area
    Personally, I don’t mind it at all. There were areas that the previous owner had patched, so what we did wasn’t anything different. They’re old floors, I don’t expect them to look like new floors or completely uniform.
  • You never know what’s underneath. Before JDL started, I had this picture in my mind of beautiful, rustic floors refinished with no hint of their previous painted life. Our floors are totally beautiful & rustic but there is still a hint of paint in between the boards. Sanders take off the top layer but if paint has seeped down into the cracks, it’s not coming out. Here you can see hints of red leftover from our very red painted floors.
    hint of red paintSame with filler. The sanders will smooth it all out but they can’t get in between boards. Even if they could get in between the boards, you’d have cracks that would trap crud & dirt. Gross. Again, this is something we were OK with. The floors are original. The paint & filler is all part of the history of our house. We’d rather have that part of the history than rip them out and put new stuff down. It seems so much more authentic this way.

From start to finish, it took JDL 5 days to complete the whole job. They started Wednesday and finished Monday (took Sunday off). They provided excellent service and value.

Saturday, Rob & I went over to the house and just laid on the floor. Yeah, we’re giant dorks. They’re just so smooth and the color is incredibly rich; simply yummy. (Satin was the way to go, by the way.) We’re very happy with them.

~ ~ ~

*Disclaimer: Obviously, individual experiences with contractors will vary. We can only share the experiences we’ve have. Our reviews are based solely on personal experience. Always do your research and check references. Happy renovating!!

Posted in Floors, JDL Flooring, Product/Service Review | Tagged , , , , , , , , , , , , , , , , , , , , , , | 4 Comments

Floors After!

As promised, pictures of the floors after they’ve been refinished. I forgot to do the 3rd floor, but it’s pretty much the same.

Living to Dining room with flash

1st floor hall

I thought it was interesting how differently the newer wood took the stain compared to the older wood. See the difference?

2nd floor back room

2nd floor back room

Stain was Provincial by Minwax on 130+ year old pine floors.

2nd floor hall

Top Step

Dining room

Living room (no flash)

2nd floor front room

Posted in Floors, JDL Flooring | Tagged , , , , , , , , , , , , , , , , , , , , , , , | 8 Comments