Finally Clean

Last Saturday, the Family Team cleaned our house top to bottom.

IMG_0087

We vacuumed, scrubbed, then mopped every square inch of our 1600 sqft abode. It was truly a team effort.

{The camera also got stranded here on the 3rd floor, so iPhone pics will have to suffice.}

There was floor refinishing dust settled in nooks & crannies, not to mention the moldings & trim.

parlor moldings

{Right before being scrubbed down. This is begging for some teenager to scrawl “Clean Me” in the dust.}

Mom A cleaning

It’s amazing what a shop vac, Mr. Clean & some rags can do to a place.

Cleaning the stairs

We even did the medallions & chandeliers. I’m not sure the light fixtures have ever been cleaned.

cleaning the medallions

It’s amazing what some hardcore cleaning will do to your outlook & mood.

Rob on stairs

Since our marathon cleaning spree, we feel lighter. The cloud of dust hanging ominously over our progress has been replaced with a more optimistic and cheery spirit. It’s no longer overwhelming to be there. I can ~ literally ~ breathe easier. The phlegmy cough that reverberated in my lungs is disappearing. We’re happier and back in love with the house. It’s an amazing, amazing transformation ~ and possibly the cheapest.

Plus – NOW WE CAN PAINT!!!! Huzzah!

Posted in 1st floor, 2nd floor, 3rd floor, general | Tagged , , , , , , , | 3 Comments

Adios Regular Phone

We have officially cut off our phone line.

DSC_0507

The phone lines snake around on top of the baseboard throughout our entire house. In preparation for painting our bedroom, the wire creeping up to the third floor and into our bedroom was removed.

IMG_0079

It was unceremoniously yanked out, staples flying every where.

IMG_0069

Decades of paint peeling up.

IMG_0073

Creating a much bigger mess than originally intended.

IMG_0075

See ya suckas!

IMG_0066

After a little scraping to smooth out the worst areas, we’re ready to clean and then paint.

IMG_0067

We don’t have a home phone now and – if we want one – we’ll get it through the cable company. Cable which was neatly & discreetly run by our dads. I love not seeing rogue cables cluttering our baseboards & moldings!

Posted in 3rd floor, general | Tagged , , , , , , , , | 1 Comment

“Just to Look”

Last night the hubs & I decided to take an impromptu trip to IKEA. Just to look.

We have 3 different IKEA’s within 15 miles of us; the closest being 5 miles away in Elizabeth. We browsed & split an order of Swedish meatballs for dinner. {awww}

It wasn’t planned. We didn’t need anything in particular but I am keeping my eyes open for a few different pieces.

I need a storage option for my 9 different sets of china, plus all my glassware.

Yeah. You read that right. 9 different SETS of china.  Not place settings, actual sets.

I collect china & glassware like most women collect handbags. I’ve never actually had my entire collection in one place though. Different patterns & pieces are scattered between my parents, Rob’s parents, & our apartment.

Nothing at IKEA has grabbed me though. I’m thinking I want something more heirloom {which IKEA won’t have} or built into the kitchen. We perused different options but moved along to housewares. We were just looking.

In housewares, we spent some time looking at rugs. We’ve never purchased a rug before; never really had the need. Besides, those suckers are expensive! With hardwoods throughout, we now need one for our bedroom {& eventually one for the parlor} but nothing has screamed TAKE ME I’M YOURS.

I saw this last night at IKEA. It’s the Hemmet Rug in dark orange for $149.

hemmet rug in dark orange $149

The price is right and the color is brighter in person. It’s an option. Like it; not sure I love it. I was thinking a pattern might be nice but solids would be easier to coordinate with. I’m keeping it in mind but it didn’t come home with us. I don’t know exactly what I want but feel like I’ll know when I see it. Besides, we were just looking.

Also saw some fun fabric that I loved.

majken in gray & orange $7.99/yard

Yeah. Loved that!

It’s Majken in gray & orange for $7.99/yd. While I’m a sucker for fabric, I didn’t have a project in mind. At $7.99/yard, it needed to have a purpose before hopping into the bright yellow bag. Again, tucked it away for future reference and moved along. We were just there to look anyway.

We made it all the way through the showroom, housewares, and the self-serve warehouse empty handed. Victory!

Then we decided to pop into the AS-IS section. You know, just to look.

Sitting along the wall was a lonely chair & a half with only a coordinating footstool to keep it company.

Chair in store

Originally $649, the Stockholm chair spent a good bit of time as a showroom display model. It was marked down 50% to $324.50. We sat in it.

Quite comfortable. Just the right size for our 2 cabooses and maybe a dog snuggled on our laps.

Slightly dirty though.
It is a floor model, so I guess that’s to be expected.
Oh. It’s a slipcover. We could toss it in the wash.
Maybe if it was a little less. Under $300 would be good.
Lets ask.
{Ask IKEA sales lady. She says things come into the AS-IS section and get marked down 30%. The longer they sit, the more they take off. She’ll check and see if it’s time to mark this little guy down again.}
Turns out – It IS time to mark it down again! Another 10% off = now $259.60.
Sold. It’s little stool friend came home with us to for a mere $35.

Waiting for the car

We thought it would wedge into the trunk. It didn’t.

45 minutes and more than a few weird looks later, it was secured to the top of our trunk with the stool & cushions inside.

Tied to the car

It was secure but we still took it slow coming home.

Ready to go!

The new additions are now sitting – naked – in our parlor while the slip covers take a spin through the washing machine. If they don’t come clean, maybe I’ll make a new cover out of that fun gray & orange Majken fabric!

Posted in furniture | Tagged , , , , , , , , , | 9 Comments

A{nother} Clean Bathroom

At the beginning of the month, Mom A cleaned the 2nd floor bathroom.  {It’s managed to stay relatively clean but only because we don’t live there yet.}

Meanwhile, the 3rd floor bathroom sat looking like this.

DSC_0424

Neglected. Covered with sawdust from our June floor refinishing & general college student grime. This was also the bathroom that smelled like vomit & mildew until we pulled the carpet squares up. {YUM!}

On the 15th, that all changed.

Mom L spent her entire Saturday getting chummy with our porcelain fixtures & Mr. Clean.

IMG_0125

Oh the things we do for love.

IMG_0124

IMG_0123

Quite the Before & After, don’t you think?
DSC_0426 IMG_0121

Thanks Mom!

Posted in 3rd floor, bathrooms | Tagged , , , , , , , | 2 Comments

In Progress

clean gloves

Saturday was spent cleaning the house from top to bottom. We literally mopped ourselves out the front doors. Unfortunately, we also stranded the camera on the 3rd floor.

D’oh!

I’m off today and headed to the house to crack open our first can of primer {squee!!!}.

Posted in 1st floor, 2nd floor, 3rd floor, general | Tagged , , , , , , , | 1 Comment

Cable Craziness

Since the house was previously rented out to 4 college students (1 per bedroom), cable was run in every room. You’d think that was a good thing.

I guess it was but it was done in the craziest way. I’m guessing the cable company came in and did it. A cable came in through the back window of each level.

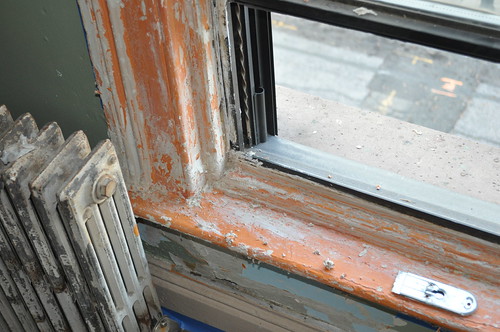
On the first floor, the cable came in low on the back right window & ran up the edge of the window trip to the crown molding.

dining room old cable
{picture taken before we closed, so that’s not our stuff}

It then ran along the crown molding, through the wall above the pocket doors & into the parlor.

Dining room cable

{Cause dark gray wire isn’t at all noticeable on yellow paint. /sarcasm}

Upon entering the parlor, it ran across the top and down the left edge of the pocket doors then along the floor to the corner.

cable in parlor

Kinda like this –

1st floor cable

On the 2nd floor, again it came in low on the back left window. This time, instead of running along the right wall, it took the long way around.

2nd floor cable before

Of course there was carpet, so you didn’t really notice it running along the baseboards. BUT this route also had a few doors to span. They just ran it up one side, over the top, and down the other side of the doors.

2nd floor cable

{The circle with an X indicates a splitter.}

The 3rd floor was even wackier. Again, it came in low on the back left window and ran left.

3rd floor back room cable before

Much of the cable was already loose by the time we took possession of the property {which you can see in the lower left of that picture}. This time, after going up & over the back bedroom doorway it came through the wall into the front bedroom small closet.

bedroom cable before

Where it ran around the baseboard, through the wall in between the doorways, ACROSS the floor of the walk-though {not up & over}, along the baseboard of the cubby and ended near the mantle.

3rd floor cable

Phew! I know cable guys aren’t picky about the placement of the cable, just so long as it works. But yeesh!! I don’t think they could have run it in a more obtrusive manner.

I’m not all crazy obsessive when it comes to design. I think homes are made to be lived in, not kept as showrooms. But c’mon. Even painted the wall/baseboard color it would have been a constant eyesore.

SOOOOOO

The dads fixed it.

Of course they did.

Best dads ever.

The original plan was to run it up through the mantle in the dining room, go through the side of the mantle, and behind wall into the parlor.

IMG_0049

Even with this monster mason drill, we couldn’t get through the brick.

DSC_0438

IMG_0047

From the dining room mantle we could see the mantle in the garden apartment.

IMG_0048

Plan B – go through the pantry closet.

DSC_0493

We were still able to see the mantle in the garden apartment from the back left of the pantry, so we ran one line down.

IMG_0053

That line will run behind this pipe.

IMG_0060

We’ve already run the garden apartment cable {coil to the left} along the back side of this pipe. The upstairs cable will join it along the back of the pipe. Both will run, discretely, out the back of the house.

IMG_0064

Excellent. Now back to the pantry.

In the left wall of the pantry, we installed a 4-way splitter {hence all these wires}.

IMG_0035

One wire for the dining room, one for the parlor, one for then 2nd floor, & one for the 3rd. This also seemed like a good place to keep the wire hub. Out of the way but no so built-in that we couldn’t get to it again.

We ran the parlor cable behind the baseboard over toward the parlor mantle.

DSC_0448

A box was installed next to the outlet and to the left of mantle.

The 2nd & 3rd floor wires ran up through the pocket door opening {but back far enough so the pocket door won’t interfere}.

IMG_0037

IMG_0041

Despite what the blueprints show, there’s a small closet in between the cubbies on the 2nd floor. It’s a scary scary closet.

DSC_0990

A little demo later…

DSC_0470

DSC_0472

DSC_0476

Once it was all demoed, the 2 cables were run through.

DSC_0497

We left it coiled up on the second floor because we’re not really sure what we’re doing with the closet space on the 2nd floor yet.

The 3rd floor cable was run up and installed into the baseboard at the bottom of the cubby in our bedroom.
{picture missing, will update when I take it}

So there you have it! How we went from a tangled, visually distracting mess to a nice tidy solution.

Posted in 1st floor, 2nd floor, 3rd floor, How To | Tagged , , , , , , , , , | 6 Comments

What Weekends Used to Be

DSC_0104

On those weekends not spent hanging out with our family, this is what weekends used to be.

DSC_0059

Lazy Saturday afternoons or quiet Sunday mornings.

DSC_0064

Time spent just hanging out on the sofa.

DSC_0097

Throwing toys.

DSC_0065

Napping.

DSC_0114

Just general hanging out.

DSC_0077

Doing whatever, whenever.

DSC_0108

Like more napping.

Not anymore!! Nowadays, our weekends are spent working at the house.

We’re making progress, so that’s rewarding. I’m looking forward to our bedroom being completed. Or at least free from dust.

I’m really really sick of spackle dust. It’s killing me. Literally. I’ve got a cough that could scare small children.

DSC_0117

This weekend will be spent cleaning up all the dust {YAY!!!} and starting to paint {double YAY!!!}.

I’ve got a few things fun things almost ready to show you but they’re not quite ready for primetime.

In the meantime, you’ll have to deal with the incredibly self-indulgent pictures of my favorite mohawked dog. I apologize.

Tomorrow there will be pictures of the house & building materials & Newark!

Today, I’m going back to the house to sand & respackle 2 walls. It’s JUST as fun as it sounds.

DSC_0119

(all pics in this post were taken in our apartment, pre-house)
Posted in general | Tagged , , , , , , , , , , | 6 Comments

Mom Always Said Don’t Strip

And mothers are usually right.

DSC_0467

Between sanding & spackling, our Saturday consisted of attempting to strip the window frames in our bedroom.

DSC_0456

We spread it on and covered it with strips of the paper.

DSC_0458

I think we made 2 mistakes with this product.

  1. We didn’t put it on thick enough.
  2. We didn’t let it sit long enough.

DSC_0460

DSC_0462

After 6 hours, we noticed that parts of the peel-a-way were drying out – which isn’t supposed to happen. We had 2 options – slather more on or take it all off.

DSC_0501

We decided to take it off.

DSC_0502

Either we should never have tried stripping to begin with.
OR
We should have put more on and let it sit over night.

DSC_0503

Unfortunately, neither of those things are what happened. We took it off then, 6 hours into it, and it was the worst.ever.

DSC_0543

We scraped & scraped & scraped. It took the first coat, maybe 2 or 3 coats off. Most of the beige-y paint came off, showing the orange underneath. In a few spots we even got the orange off.

DSC_0541

The peel-a-way has to be neutralized, so we washed it off with vinegar.

DSC_0504

It made the whole room smell like salad. Mmmm… salad….

DSC_0506

{See that shiny dot in my hair? I lost my hair tie & pulled my hair up with a few drywall nails. Klassy.}

At the end of the day, I cannot say if I would or would not do it all over again.

DSC_0515

Part of me wonders if all that time and energy and effort and sweat and frustration was really worth it. I’m glad we didn’t get over zealous & try to strip anything else.

Another part of me is glad because it did remove a few layers of paint. Sunday we sanded everything down and it does look better. It’s not perfect but it’s better. Getting it down to the wood to stain was never our intention. It’s just going to get painted white. I think it’ll be ok. It will be fabulous. 

We also learned that the ENTIRE bedroom was once painted orange.

Look at this cross section of the wall paint.

DSC_0518

Yup! It was on the walls and the trim. Lots & lots of orange. While I’m not going to paint our bedroom orange, I like it. It’s gutsy.

So spill. Have you ever stripped?

Posted in 3rd floor, bedrooms, Product/Service Review | Tagged , , , , , , , , , , , , , , , , , , | 7 Comments

Fixing the Kitchen Cabinet

Back at the end of July, our awesome friend Erin helped us primeone of the free kitchen cabinets we found on craigslist.

free cabinets

As you can see, the base cabinet is most definitely used and has holes from its prior installation.

DSC_0020

It was FREE! What’dya except?

DSC_0292

Part of the larger hole on the right is on the bottom of the cabinet, all the others are in the sides. Covering the holes doesn’t really need to be structural, it just needs to keep fondue forks from falling through. {Doesn’t everyone keep their fondue pot at the ready?}

Enter -> Scrap Luan! Yes my friends, this project cost zero dollars because I was able to use stuff we already had laying around.

I used luan for two reasons.

  1. I already had some stashed in the basement
  2. It’s thin stuff. I was looking to cover the holes while encroaching as little as possible on the interior storage dimensions.

I started with the floor; measuring the length & width of the space and completely ignoring the center support. Just cut a big rectangle.

floor

Great! Now measure from the right wall of the cabinet to the left side of center support.

Your cut should be a little left of the exact middle.

cut in 2

Tip: Using a guide helps keep the circular saw moving in one straight line, without the worry of fading off to one side or the other. In this case, I used the metal drywall square. The guide doesn’t get clamped directly at the measurements though! If you’re using a circular saw, you have to account for the plate around the saw blade. My saw is set in 1″ from the left side of the plate & 4″ from the right but yours is probably different.

Just mark your measurements at the top & bottom of the cut, line your guide up and slice away.

You should end up with 2 rectangles, one slightly wider than the other.

2 bottom pieces

Next, we have to cut a notch for the center support.

Measure the interior support and mark the cuts on the larger of the two floor halves (I did mine on the right half).

marked center cut

Using your cutting tool of choice, cut your notch. I used our nifty little Rockwell. One of the few power tools my husband has claimed as his own {Although I’m plotting it’s secret takeover as we speak. It’s that awesome.}.

cut with the Rockwell

Make sure the piece fits.

Right floor piece

Look at that notch!

notch close up

DSC_0037

{this is the part where you say, “damn you’re good!” and I say, “aww shucks; it was nothin”}

DSC_0039

Fit in 2nd half and glue everything down.

glue it down

I added some screws for added adhesion. The luan had a couple wavy spots {which is also why one half is flipped upside down}.

floor in

{Ignore the overhang of the left half front edge, it got sanded down flush with the cabinet.}

Moving on to the walls. Easy-peasy as they’re just rectangles.

sides installed

I cut mine short enough so they wouldn’t interfere with the cabinet drawers above and shallow enough to not interfere with the door hinges {black arrow}.

save room for hinges

Even with the primer you can see the holes from the door hinge holes, so they’ll be easy to pop back into place {blue arrows}.

The back piece gets cut to fit in between the 2 side pieces. I cut the back the same height as the sides, so it’ll look like one big piece when it’s painted.

back

I caulked the seams & spackled the holes.

DSC_0550

After a quick sanding, we’ll be ready for paint!

Posted in garden unit, How To, kitchen | Tagged , , , , , , , , , , , , , , , | 2 Comments

Bonus Post: SwedeShop

If you’re a fan of IKEA and have an iPhone, you should check out this new app (featured on IKEA hacker today).*

Ditch the paper & stubby pencil! It’s a shopping list app where you can enter all sorts of important info you’d write on the paper list. You can set a picture, description, even what aisle & bin to find the product in.  This app also lets you set a budget (and include tax!). It warns when you’re over budget by vibrating.

swede shop

Usually retails for $0.99, it’s FREE today (midnight pacific time, 18 August 2009). I’ve only begun to play with it but – HEY! – it’s free. If I don’t use it, it can easily be erased with no loss of moolah.

(*Recommendation not valid if product isn’t free. I honestly haven’t play with it much yet, so I don’t know if it’s totally worth the $0.99. Guess a trip to IKEA is in order to give it a test run. Oh the sacrifices I make for this blog.)

Posted in Non-house | Tagged , , , , , , , , , | Leave a comment