My headboard project started back in September and I’m a little embarassed to say it hasn’t progressed much since. Although, the vision has waivered much since I shared my inspiration and I’ve worked on it a little bit here & there but it’s still in pieces. To make myself feel more productive, I’m going to share a quick “How To”.
Which is kinda silly because there are directions right on the package. But I do have a little trick that may just save your poor fingers from being smashed with a hammer. I speak from experience.
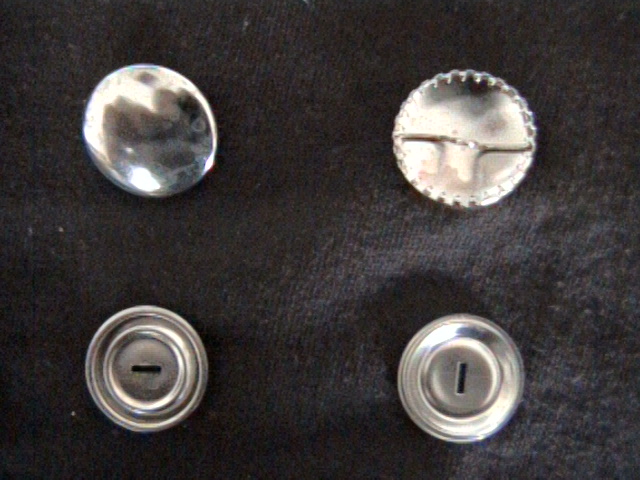
First off, get the kit with the tool. Do NOT get the buttons with the little teeth that are supposed to catch the fabric. They are beyond infuriating. BEYOND. Save yourself the grief. They look like this –
You want the little holder tool. Here’s everything you’ll need –
“Spackle knife?! Why the H-E-double-hockey-sticks do you need a spackle knife for making covered buttons?!” you may be asking yourself. Well I’ll tell you.
UPDATE: I forgot one other tip!! See in the above pic how the button front is white? They come silver, like the backs. But if you’re using a woven fabric like I was, the silver sparkles a little through the fabric once the button is assembled because the fabric stretches. It’s not crazy noticeable. {In fact I’m pretty sure there was an eyeroll when the hubs asked why I was spraypainting them.} But I noticed and it would bug me long after the headboard was done. {Crazy? Party of 1?} A little white spray paint totally matted things out and took care of the shine. Sparkle free buttons!
Follow the directions as per the package –
Be sure the tuck all the edges in nice and smoothly around the button. You don’t want any pleats or folds along the edge of the button.
THEN!
Instead of just trying to hit the little blue target with your hammer {which usually just ends up flipping the blue cap across the room}, hold it in place with your slightly beat up spackle knife.
{Dad, you might not want to continue reading. I’m pretty sure this was is your spackle knife. Sorry!!}
Don’t use your favorite, most perfect one either. Use one that’s a little beat up, maybe a tad rusty ~ you know ~ B-Team Spackle Knife.
Hold thusly.
HAMMER. You’ll feel the metal back of the button squish down a little. That’s good! You want to feel it squish down all under the lip of the button.
See the blue cap smooshed down a little?
That’s good.
The metal button back should be firmly stuck to the front of the button with your fabric sandwiched in between.
Then it just pops out.
No squished fingers or frustrated DIYers!
Now to actually finish the headboard… All in good time, my friends. All in good time.









Those buttons are adorable. I wanna steal them and use them as thumbtacks!
They would make totally adorable thumbtacks!! The little metal piece on the back would easily snip off; super glue on a thumbtack; you’d be all set!
ha, so we used the ones with the teeth when making a headboard for my mom recently and i got sooo frustrated with the stupid things! good to know that there is an alternative, that looks way easier.
I used the one with the teeth and didn’t have any problems. But, I will try the tool ones next time to compare.
Cannot wait to see your headboard.
Well Dear, nicely done (again); but your warning appeared a little late in the article. As soon as I saw your tool selection, I knew what was coming. Love you, Dad L