Last Christmas, I Gave You My Card

While we’ve been together for over a decade, this is actually only our 2nd married Christmas. One of our new married-life traditions is sending Christmas cards. {Getting them isn’t half bad either.}

We’re not your traditional type people. We like making them fun to read and kinda quirky. Our cards last year won Kim’s 2008 Christmas Card Contest.


{click to enlarge}

The seemingly typical front picture isn’t so typical.

christmas card 08 front with text

And if you have any idea where Rob works, you understand why the topic of paternity came up. {Although who wouldn’t want this kid as a baby? Isn’t he adorable??} We can only imagine the questions our friends & family were thinking to themselves.

Why am I bringing this up??

We just finalized the text for this year’s cards!

Now they just need to arrive so we can assemble & send them out. I’m so excited. They’re pretty fantastic, if I do say so myself. Here’s to staying the reigning Christmas card champs!

I love Christmas!

Posted in Non-house | Tagged , , , , , , , | 5 Comments

Thermocouple

After all these arts & crafts posts, we need to get back to some serious home DIYing.

Except, we have a little problem.

This is our furnace.

DSC_1082

Prior to owning a home, I only had to deal with one other furnace. In college we rented a 1920’s home. The furnace was oil and original to the home. It could have been a nightmare but we only had to keep an eye on the water level. It was pretty painless.

A few weeks ago… ok… probably over a month ago we noticed it was really cold in the house. Playing with the thermostat didn’t trigger any response in the heat department.

I went down to the basement to investigate. Our pilot light was out.

Luckily, the directions to relight the pilot light are on the side of furnace.

pilot light instructions

We needed a long BBQ lighter to reach the pilot safely.

DSC_1112

2.5 weeks later – we finally remember to pick up said lighter.

I follow the instructions…. hold button down, light pilot light, hold button for an additional 30 seconds, slowly lift finger off gas release.

The pilot light goes out.

I do it again. Hold button down, light pilot light, hold button for an additional 30 seconds, slowly lift finger off gas release.

The pilot light goes out.

And again. Hold button down, light pilot light, hold button for an additional 45 seconds, slowly lift finger off gas release.

The !$(*&%# pilot light goes out again.

One more time. Hold button down, light pilot light, hold button for an additional 60 seconds, slowly lift finger off gas release.

DSC_1102

GAH!! The pilot light goes out AGAIN. BLEEP BLEEP BLEEP BLEEP! Gah.

5th times got to be the charm. Hold button down, light pilot light, hold button for an additional 30 seconds, slowly lift finger off gas release.

Nope. Nothing different. The pilot light goes out AGAIN.

Frustrated, I head back upstairs and straight to my laptop. Google the symptoms. There I learn about this thing called a “thermocouple” and find this picture.

As described in the article, a thermocouple is basically safety device that prevents the gas from running if the pilot light goes out. A faulty thermocouple will just keep shutting off the gas, thus the pilot light won’t stay light and the furnace won’t light and you won’t have heat.

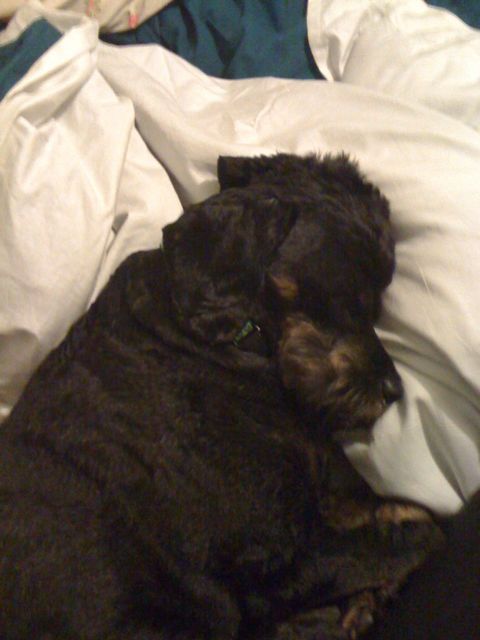
Without heat, you may find yourself spending your evenings after work snuggled on the heated mattress pad with the dog.

I don’t know if you’ve every tried to accomplish something while not leaving bed. It’s pretty much impossible.

We need heat. Therefore the thermocouple needs to be replaced. The first step is removing said faulty thermocouple.

Turn off the furnace and wait a bit {you want any lingering gas to dissipate}.

DSC_1091

Right near that, is the thermocouple connection {it’s the copper tube}.

DSC_1127

Unscrew it.

DSC_1129

Mine took a bit of muscle but eventually it came loose.

Next, find pilot light & thermocouple.

DSC_1115

Remove some of the burners.

DSC_1117
{You don’t need a screwdriver to take the burners out, they just pull out. Lesson learned.}

There she is!

DSC_1119

I’ll be honest, I had NO idea how to get the thermocouple out. So I mistakenly unscrewed the bracket from the burner it was attached too. Hopefully it’ll go back easily. Hopefully.

DSC_1131

detach a thermocouple

TA-DA!

thermocouple

Tools I used.

tools to remove a thermocouple

Now we just have to replace it. Cause there’s still no heat.

Posted in garden unit, How To | Tagged , , , , , , , | 6 Comments

Guest Posting at Glocally

Today I’m over at Glocally Newark sharing my Top 10 Tools.

Won’t you join us?

Posted in bloggy | Tagged , , , , , , , , , , , , , , , | 1 Comment

Cranberry Orange Walnut “Cookies”

For this weeks challenge I went with something a little untraditional. {Untraditional? Me?? I know; you’re shocked.}

I found this recipe on allrecipes.com and thought it sounded really interesting & yummy. I like soft chewy cookies. Crunchy cookies? No so much.

photo.jpg

I made it two different ways; the first time exactly as the recipe said and a second more healthy. Neither version had the consistency or sweetness of a traditional cookie. Think muffin or cake like texture. Or maybe “spongy” but that doesn’t sound as appetizing and these are really tasty. They’re very similar in texture to a cranberry, banana, or zucchini bread {actually tasted a lot like cranberry bread}.

DSC_0300

You want to make them??

Carrie’s Healthy Cranberry Orange Walnut “Cookies”

1/2 cup unsweetened applesauce
1/2 cup Splenda/Sugar mix
1 teaspoon vanilla extract
1/4 cup egg substitute
1 cup solid pack pumpkin puree
2 1/4 cups all-purpose flour
2 teaspoons baking powder
1 teaspoon baking soda
1/2 teaspoon salt
1 1/2 cup fresh cranberries sliced
1 teaspoon ground cinnamon
1 orange zested
2/3 cup chopped walnuts

DSC_0034

DSC_0080

DSC_0108

First, prep:

Wash the cranberries. It’s easiest to pick out the bad ones if you put them in a colander in a sink full of water.

DSC_0046

Then run them through the slicer attachment of your KitchenAid. Or just chop them up by hand. The KitchenAid attachment is more fun.

DSC_0136

You want them to be good size chunks. {1/3’s or 1/4’s would work as well.}

DSC_0241

Zest the orange.

DSC_0246

Now for the mixing.

Blend the wet stuff.

DSC_0215

DSC_0218

DSC_0220

DSC_0074

DSC_0081

DSC_0245

Then all the dry ingredients.

DSC_0134

DSC_0123

{all the flour, not just 1/4 cup!}

DSC_0114

DSC_0121

Plus the cinnamon & baking soda.

Finally, stir in {by hand} the orange zest, cranberries, & walnuts.

DSC_0254

DSC_0235

DSC_0144

The dough is going to be kinda sticky. Ok, a lot sticky. But that’s ok! It won’t spread like normal dough, so don’t worry.

DSC_0265

Using the 2 spoon scoop method, spoon small blobs of dough onto a cookie tray sprayed liberally with Pam.

DSC_0260

If you don’t spray it with Pam {or other brand of choice}, the cookies stick {they don’t have any fat in them}. Then you have to scrape them off with a giant metal scraper while trying not to scratch the pan. At least that’s my theory. Yeah… theory.

Bake on 375 for about 10 minutes.

DSC_0269

10 minutes for these size cookies, 15 for larger ones.

DSC_0276
{freshly just put in the oven}

DSC_0284
{ready to be done}

As you can see, the cookies puff up a little after they’ve been baked but don’t really spread horizontally.

DSC_0296

Yummy! Our batch made 56 small 2-bite sized cookies.

DSC_0299

Enjoy!!

DSC_0302

Feel free to download the recipe and try it for yourself! I’d love to hear how it went. Happy baking!

Don’t forget to head over to Kim’s blog and check out everyone elses yummy creations!!

Dare to DIY

Posted in Dare to DIY, How To | Tagged , , , , , , , , , , , | 10 Comments

Badass Blogger

Last Friday, Lily at Tapdancing in the Dark sent over another little bloggy award.

{Sidebar: I forgot to include Lily in my Brick City Love around town post! I was her featured follower a couple Friday’s ago. I’ve known this lady since we were in diapers {TMI??}, so it was cool to read about myself from her perspective. Lily is a ridiculously talented writer and even shared an excerpt from her novel. Check it out. Take your time. I’ll wait.

Back?

Ok. Now put her in your reader. Well, put her in your reader as long as you don’t have delicate sensibilities. Those easily offended need not bother.} Anywhoo…. back to the reason for this post.

Apparently she thinks I’m a badass blogger.

BABlogger

And, I mean, I kinda am. I make all sorts of badass things like bedskirts and cake stands. Although, a pink thanksgiving tablescape might be the most badass thing I’ve ever made. {“…pink Thanksgiving tablescape…”? Yup! Super badass.}

Now if you’ll excuse me, I’ve got to find something to ruche.

Posted in bloggy | Tagged , , , , , , , , , | Leave a comment

Happy Thanksgiving!

Thank you for joining us on our renovation odyssey here at Brick City Love! We are so thankful for your support and interest.

We’re thankful for the support & sweat given selflessly by our friends and family, for the opportunity to be a part of our city’s renaissance and the new friends we’ve met because of it. Thank you.

Wherever your Thanksgiving may take you, we hope you’re happy, warm and surrounded by love.

Snuggled under cozy covers napping isn’t a bad way to spend a holiday either {or any Thursday afternoon}.

xoxo,
Carrie, Rob & Bruce
{& Phoebe in the red comforter}

Posted in Uncategorized | Leave a comment

HOW TO: Make “Thankful…” Leaves

For Monday’s challenge, I decided to put myself on a budget.

You ready to see the outrageous leash I gave myself?

Are you???

My budget was. . . . . .  $0.00

That’s right! Zero dollars and zero cents. Free. Gratis. No monies.

The pink corduroy, lace, pumpkin goblets, real silverware, and cloth napkins were all pulled from Mom’s stash. Since the china is currently being kept at her house too, I guess you could throw that on the list too. {Thanks Mom!!}

What didn’t I borrow from Mom?? The yellow IKEA tree.

DSC_0696

Hanging on that punchy tree are the only things I actually made for my tablescape {is that even a word?!}, my thankful leaves.

DSC_0774

Those had to have cost money, right?! NOPE!!

They’re made from paper bags.

Yup. Simple, free, paper bags that brought groceries home from the grocery store.

The front side of our bags was printed with an advertisement but the back was completely blank – inside & out.

I started by cutting out the back side of the back. It’s just about the size of 2 ~ 8.5×11 sheets of paper laid out side-by-side {or about 8.5×22″}.

DSC_0669

Cut out 2 ~ 8.5×11″ pieces of paper bag. In your favorite word processing program, create your text. Print it out on your pieces of paper bag.

Here’s mine, if you want to use it.

Then I ran the sheets through the corrugater/krimper thing {blue plastic thing at the top of the pic}.

DSC_0672

DSC_0674

Using a real leaf for inspiration, I cut out leaves.

This was honestly was the most difficult part for me. It took a lot of finessing for me to get something that remotely looked like a leaf and not a weird blob. I could have fit more leaves per paper bag page if I had traced a template. But I’m lazy. And that would have added a whole extra step or few {find a template, print & cut it out, trace}.

DSC_0681

One time through the krimper didn’t make them as wavy as I’d have liked, so I ran the individual leaves through a second time after I cut them out.

DSC_0676

Sidebar: I did the place cards the same exact way!

DSC_0683

Punch holes in the stem end. Thread your favorite ribbon through. Tie.

DSC_0734

All done!!

DSC_0692

Have a HAPPY THANKSGIVING!!

Posted in Dare to DIY, How To | Tagged , , , , , , , , , , , , , , , | 4 Comments

Brick City Love Around Town

And by “town” I mean the “interwebs.”

I want to give a big THANK YOU to Kim at NewlyWoodwards. Ya’ll know I’m participating in her DIY blog party but she featured my Upcycled Wood Display on her blog last Thursday. Kim is the sweetest and can totally come play with my power tools any time!

The same project was also featured over at Networx. Networx was completely unknown to me until now. Since their email {giving me the heads up about the feature}, I’ve had fun exploring their website.

Finally, I’ve got a new little project going on ~

Glocally Newark is a great blog here in Brick City that I’ve enjoyed reading for quite a while. In their own words, “Glocally Newark is non-political, concentrating on the lifestyle in Newark and its budding social and cultural scene.” Well…

drum-roll please!

Brick City Love is now their home improvement guest blogger! {curtsies} We’re a whopping one post in but look forward to stopping by Glocally twice a month. Our first guest post premiered Friday. It sheds a little light on my design & lifestyle philosophy and isn’t Newark-centric {so all you non-locals may find it interesting too}. I’m pretty excited about it and will let you know when post #2 is up.

Is there anything you think would make a particularly good post? Something you’re wondering how to do? Or curious about? A project you’re not sure how to get started or an idea to share? Do tell!

{Thanks for sharing the brick city love! Finding out that someone is inspired by or thinks something we’re doing is cool is a huge compliment and we’re beyond flattered.}

Posted in bloggy, Locally Newark | Tagged , , , , , , , , , | 5 Comments

A Pink Thanksgiving

It’s that time again! Week 2 of the DIY blog party {Kim of NewlyWoodwards fame}.

Thank you for your help with Friday’s poll. 70% of you should be pleased with the direction I chose this week, the remaining 30% . . . well, I compromised. Kinda. {30% of readers seemed like an awful lot to disappoint, so I think you’ll notice a nod to my “Thanksgiving Picnic” theme.}

First, lets recap on Week #2’s mission: Dare to… entertain!

Show us your table! If you are not hosting Thanksgiving, take this opportunity to make your table look great. Bring out your dishes and napkins and set your table. I promise you that it will make you smile every time you walk by. Get creative and use new things. Or go true DIY and make something totally new.

Without further adieu, I bring you {drum roll please…….} DUN duh DUN!!!

HEIRLOOM CHINA

DSC_0772

This table was inspired by the china {Rosebud by Spode, I believe}.

DSC_0767

Pink & yellow aren’t your usual autumnal colors but why not?

DSC_0696

It’s been unseasonably warm here in Jersey, so I envisioned this small dinner or dessert outside in the backyard with a fire roaring nearby.

DSC_0723

While I’m not usually a pink person, I think it’s cheery & bright. The texture of the fabric – corduroy keeps it seasonal.

DSC_0712

The china originally belonged to my Great Uncle John before he handed it down to me. He past away 11 days ago.

DSC_0726

I’m thankful I have these dishes to remind me what a gracious person he was.

DSC_0702

The dishes are accented with vintage {some antique} sterling silverware. The intentional use of varied patterns was to keep things from getting overly formal.

DSC_0755

Bread plates stayed stacked, waiting to be passed out as needed once the food hit the table.

DSC_0752

As did the coffee cups. {Uncle John always drank coffee; every meal, no matter what time. I don’t think I ever remember him drinking water.} Cream & sugar waiting patiently as well.

DSC_0802

Vintage pumpkin shaped goblets {from my mom’s stash} await your cold beverage of choice. White wine, perhaps?

DSC_0739

The centerpiece ~ a bright yellow metal tree from IKEA ~ is a little wacky and a lot of fun. The cheery color pulls from the yellow in china while the branches hold messages of thankfulness.

DSC_0734

Guests would take a leaf, write what they’re thankful for on the back, and then hang it on the tree.

DSC_0774

Mismatched chairs in the same dark wood tone finished things off.

DSC_0796

Don’t forget to head on over to the NewlyWoodwards and check out everyone else’s tables!

Dare to DIY

Posted in Dare to DIY | Tagged , , , , , , , , , , , , , , , , | 20 Comments