
Ahhhh, the end of April. For anyone in the college admissions world, you know that being able to breathe is only a day away. May 1 – the magical national deposit deadline – is just a few hours away. With that comes all of the last minute enrolling and anti-melt initiatives but the massive, show-stopping events, are over until fall.
Life will begin to resume some semblance of normalcy (whatever that means) and, hopefully, a more reasonable work-life balance.
A few weeks ago, I brought you up to the minute with where the kitchen was. I didn’t have anything to update because, with work, not much had happened in the kitchen.
This week, there is progress to share. DUN-duh-DUNNNNNNNNN!!!!!

After Dad & I got the soffit cabs hung, they stayed like this for a few weeks –
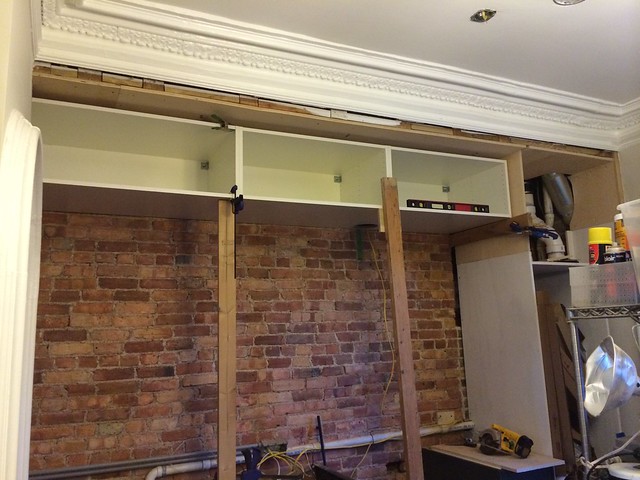
The front edge of the 24″ deep cabinets supported by 2x4s and clamps.
With such deep cabinets, we didn’t trust the downward force on the front edge of the cabinets to not weaken the connection of the rail out of the brick wall.
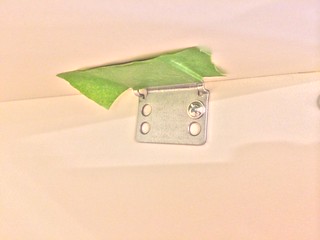
The front edge of this row of cabinets needed to be supported and the easiest way to do it was with some leftover IKEA cabinet brackets.
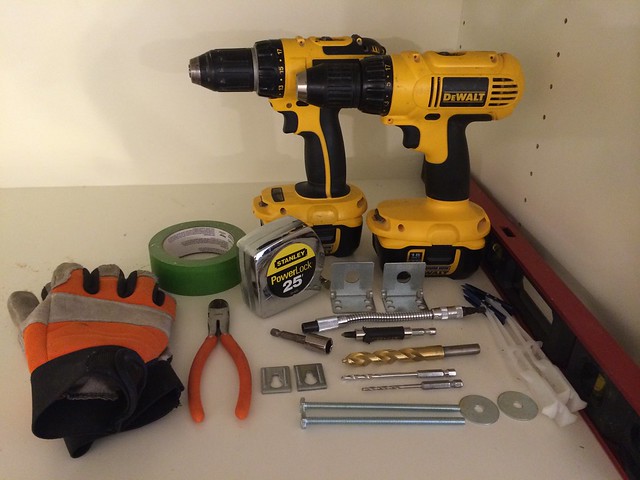
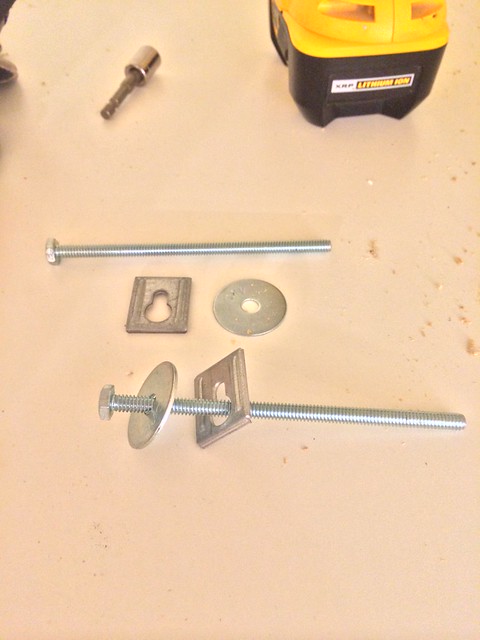
This is what I needed to get the job done –
Here’s basically how it went down:
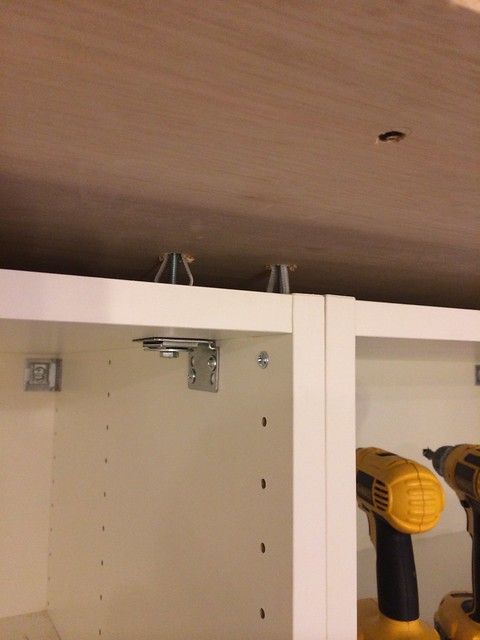
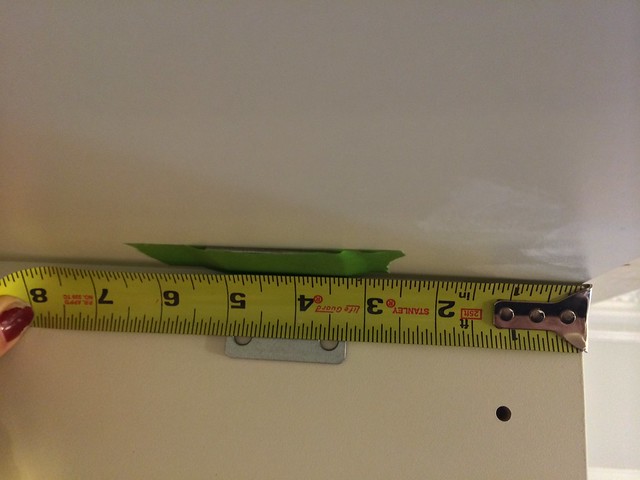
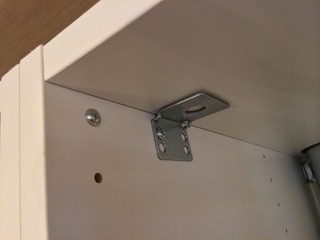
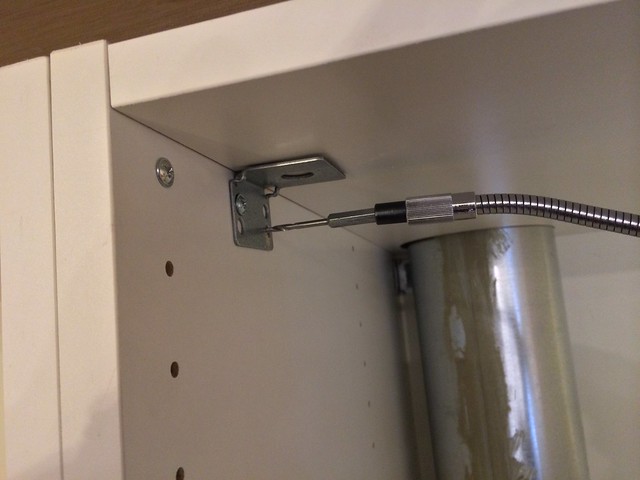
Measure back far enough so the bracket doesn’t get in the way of the cabinet hinge.
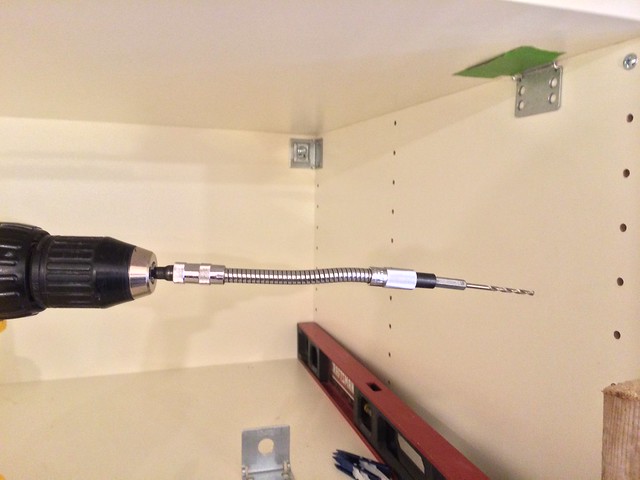
The top holes are too close to the top corner of the cabinet, so I need to use a flex drive to squarely drill the hole.
Gloves protect your hands from the friction.


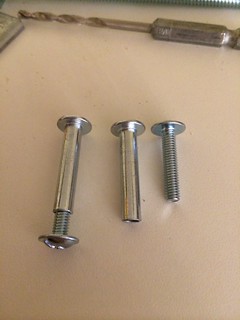 With a bracket in each cabinet, I used these leftover bolts, to tie them together instead of screws.
Then go back the other way
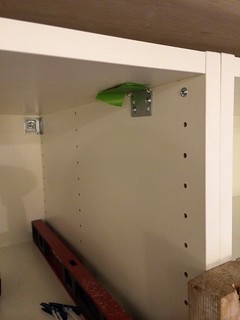
I used the holes on the diagonal because that puts the most material between the two holes.

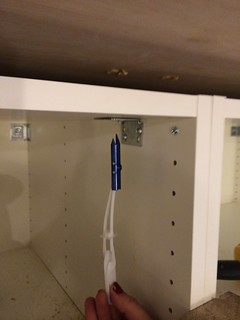
Once the brackets were secured, it was time to drill through the top of the cabinet and into the plywood above.

I find these zip-toggles are so much easier to work with than regular toggle bolts.
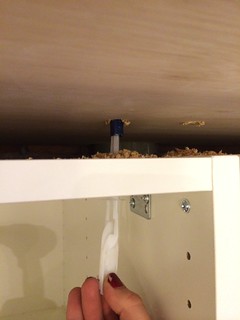
Then it was a matter of putting together all the right hardware – 5″ hex head bolts, the IKEA bracket plates, a couple fender washers and a hex head for my drill.
Thread the bolts into the toggles.

Tighten with the hex head in your drill.
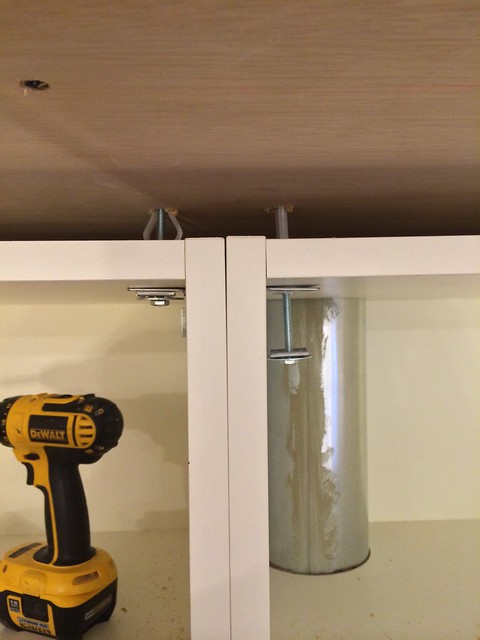
Adjusting the bolts in & out leveled up the cabinets front to back. And – BAM! – just like that, no more 2×4’s were needed for support.
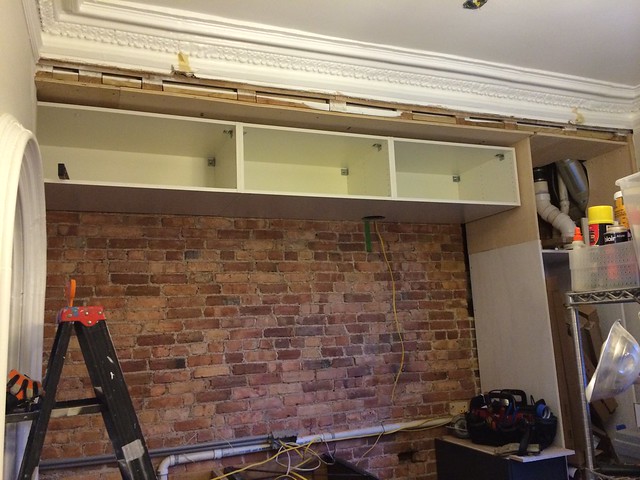
The soffit cabs were in, up and secure.
I put in 6 toggle bolts in total, plus the end in the blind is screwed directly into a stud. Don’t think these suckers are going anywhere. Which, after all, is kind of the point.
YAY!! PROGRESS!!!


We feel your pain here with the May 1st deadline. Adrian has been working waaay too much. Cabinets look great!
Thanks for the introduction to zip toggles. That’s a product I didn’t know I needed (desperately) until now!
Progress! That is more than i can say. I understand how busy this season is for you. Did you ever see the movie Admission? Part of it was filmed at the school where i teach.
Pingback: Kitchen: |