
Thank you for crushing on my upcycled wood display! It was super fun to make ~ which is good because a few not so subtly hints were dropped regarding Christmas presents and wanting one. To keep up the illusion that Christmas presents are supposed to be a surprise, I’m just going to say, “We’ll see. ;)”
If you want to make one of your own, here’s how.

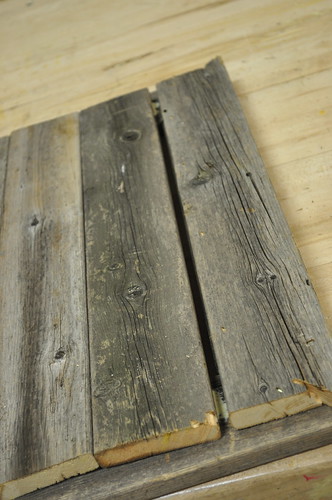
After Rob & Dad A ripped out our old fence, I pulled a few pieces out of the pile to save for this project.

The ends of each piece were in pretty bad shape, rotted and filled with nail holes from being attached to the cross beams.

I was able to get 2 good 24″ pieces from the middle of each board.

I started with a vision in my head and never actually drew it out. If I had, I would have been able to cut each piece to the exact measurements I needed right at the beginning. But since I was kinda making it up as I went along, all the pieces got cut to 24″.

Then I laid them all out in a mock up of what I was picturing. It basically looked like this –

{front}

{back}
To do this project, you’re going to need:
- Wood in 3-4ish” wide pieces, such as a dilapidated fence
- Saw {I used a combination of miter, table & band saws but you could also do the project with just a jig-saw or circular saw}
- Wood glue
- Pneumatic staple gun, with 1 1/4″ staples {screws or regular nails would also work fine – although I might’ve pre-drilled my fence if I’d used either of these options}
- Soldering Iron
- Carbon paper
- Phrase you want burned on the wood, printed out in desired font & a pen {mine was in Century Gothic}
Because each board weathered differently, had knots in different places, some were slightly warped, varied textures & colors. Laying them all out allowed me the opportunity to rearrange things so all those differences worked harmoniously together.
I picked the board that was going to be the bottom of my frame and placed my phrase. I wanted mine to be right-justified.

No matter where you put yours, remember that the edges are going to get mitered! If you put your phrase all the way over on the board, it’ll get chopped off.

So be sure to inset your phrase at least the width of one board from the edge.

Place the carbon paper under your printed phrase & trace. {note: the Dritz Tracing paper at the top of the frame is not what I used. That’s actually for fabric. We just store the carbon & tracing paper in the same packet.}

This part takes some time. Check that the letters are showing up as you go. They don’t need to be super dark but you do have to be able to see them.

Then it’s time to make some sawdust. Start by mitering each corner of your frame pieces. The top & bottom pieces should be exactly the same length, as should the right & left pieces.

To do this, I cut the first one {just eyeballed it}. Then laid it on top of the 2nd piece and lined it all up on the miter saw.

Move the top piece out of the way and make your cut.

All four corners should fit nicely together if you did it right.

Cut 2 extra mitered pieces the same exact size as the right & left sides.

When you’re done mitering, you should have 6 pieces each with 2 mitered ends – 2 for the top & bottom of your frame, 2 for the right & left sides of your frame, and 2 extra that are the same size as your right & left sides.
Now comes for the mildly tricky part. See those top & bottom pieces on the back of the frame?
See how the pieces are notched in on the outer edges? Do that by making a miter cut about 1/3 of the way through the board. Then go back and make a straight cut up to meet your diagonal cut.

Staple/nail/screw the top frame piece to the notched piece. The front side frame is initially held together by these 2 notched pieces.

{this is looking from the back side}
Then fill in the spaces with your remaining boards, lined up to the inside edge of the notched out piece.

Obviously the 24″ pieces will need to be cut down a little. Glue & staple in place.
I ended up with a little gap, as you can see in the picture.
I just sliced off the edge of an extra piece, slipped it in place and stapled.
Now to fill in those notched out edges….
WHAT’S WITH THEM ANYWAY?!
It would have been way simpler to just attach the frame to the back slats but the freshly cut edges were so… fresh.

I wanted it to look a little more professional with the back edge capped off with a mitered finishing strip.
Remember those 2 extra pieces we cut back when we were making mitered cuts? Now’s the time to grab those. We’re going to be slicing off the long sides.

One side was about 1″, the other was closer to 7/8″, so always remember to measure twice & cut once!

Glue & staple in place.

We now have a frame! Time to get to burning those letters.

I used a soldering iron. The tip was just the right shape & thickness for the font I chose {century gothic}. I practiced on a scrap piece first.

It took some practice but just take it slow.

The soldering iron will burn but not ignite the wood {as long as you keep it moving}

Time for poly! I started on the backside because I wasn’t sure how the poly would change the wood.

Turns out, the poly transformed the dry gray wood into something that looked almost stained.

Way better than I expected!

Here you can see the bottom half with the poly & the top without.

Still half poly-ed but a whole view of the front without photos.

Once your poly is dry, you’re done!


Enjoy!! Happy building!
Update: If you want to read how this project came to be, click here.
Update: If you’d like to make the bulldog pushpins featured on this display, click here.


You are a genius! I am so not creative.
I totally thought you stained it. I’m amazed that it’s just polyed.
And, I totally just found out that hubby has a soldering iron. Now, I have to find some wood to practice words on. I just love that.
You deserve some sort of award for this. Creative, cute and fun! Go girl!
I agree with Sara. And I also have to say “why do all the cool projects require work!” I would like to be lazy and have these things magically transform themselves while I watch. I guess that is why I read blogs like this. 🙂
nice shop!
Yeah! Not mine {I wish!}. Tagged along while my dad was building a set for his latest show.
This is so creative, I absolutely love it!
This is just fantastic. The poly was a master touch, but even the old gray wood isn’t half bad. Thanks for sharing!
Pingback: Fracture's Weekly Inspiration Round-up #2 | The Fracture Blog
Pingback: Rob’s Corner Part 2: Top 5 Home Improvement Activities For A Husband Who’s Not Very Handy « brick city love